Top 5 Best Accessories for your Exmark Lawn Mower

Top 5 Exmark Lawn Mower Accessories

If you have an Exmark Lawn Mower, then you already know how great it is.  It’s not hard to fall in love with an Exmark mower.  Between Exmark’s tremendous engineering, quality and intuitive controls, it’s not hard to see why Exmark is ahead of the class in commercial and residential lawn mowing.  Along with Exmark’s amazing performance, they even have a few accessories that can instantly improve your mowing experience.  If you would like to take your cutting to the next level, then check out these awesome Exmark Lawn Mower Accessories.

12volt5. 12 Volt Adapter

This 12 Volt Adapter lets you power anything you might need while you’re mowing.  This is an absolute must-have for any operator.  Whether you’re charging your phone, GPS or any other accessory, this adapter is a necessity.  It’s also conveniently located to make it easy to access during operation.

trash4. Trash Container Kit

You don’t have time to stop and worry about debris while you’re mowing.  And now you don’t have to!  The Exmark Trash Container Kit allows you to pick up any trash or debris and throw it away on the go – in no time at all.  This container is conveniently located within arm’s reach of the operator.  It features a 2.5 Gallon capacity basket with durable, easy to clean, mesh material.

ultravac33. UltraVac Bagger Collection System

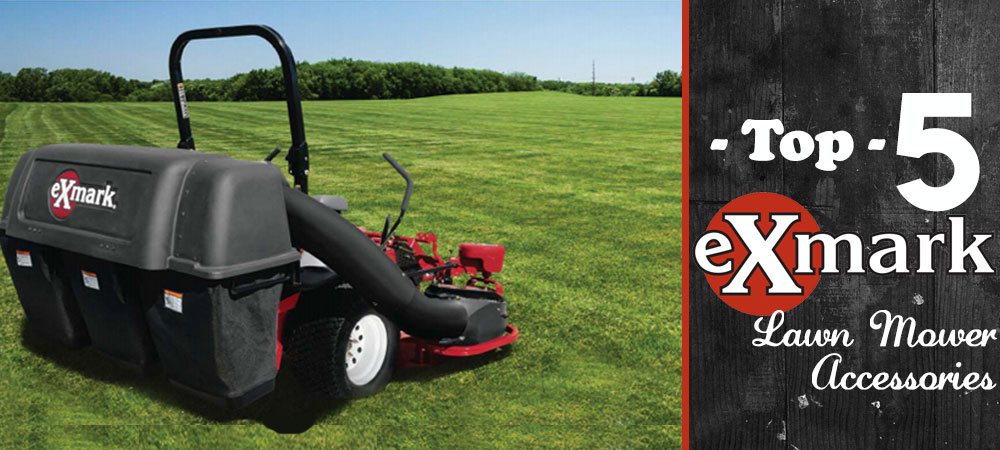
The Exmark UltraVac Bagger Collection System takes your yard to the next level of quality. This bagger collects all excess debris into the hopper with every pass, which leaves behind a neat, crisp appearance.  Along with picking up any grass clippings, bagger systems are also great at picking up leaves in the fall, making your lawn look flawless.

The Exmark UltraVack Bagger collection system also features quick-attach capabilities, which allow you to easily switch between side discharge and bagging.  Plus, only Exmark’s bagging system features a wide diameter tube that helps reduce clogging.

ocd2. Operator Control Discharge

When mowing around sensitive objects like cars, windows, and mulch beds, you know that every second counts.  The operator control discharge system allows you to quickly and easily operate the discharge chute.  This awesome accessory is compatible with any Exmark Lazer Z or Vantage Lawn Mower.  This is a must-have accessory – especially for landscape professionals.

stripingkit31. Turf Striper Kit

Have you ever been at a baseball game and paid attention to the outfield?  Most ballparks use a really neat looking striping effect for their outfield grass.  This gives the lawn a beautiful, professional look.  Well, now lawn stripes aren’t just for the ballpark.  With the Exmark Turf Striper Kit, you can have that fresh, ballpark look right in your own backyard.

These striping kits attach to existing mounting points, which makes installation quick and easy.  The innovative design makes it easy for you to service the striper kit, which will make sure that it lasts season after season.

Five Quick and Easy Labor Day Weekend Projects Around the Lawn

5 Easy Projects to get your Lawn Ready for Fall

Each year, Labor Day comes along to celebrate you!  You’ve been working hard all year long and it shows!  To celebrate all that you do, we’re giving you the day off!  So take an extra long weekend and relax!  Kick back and enjoy some “you time!”  Labor Day weekend is also great for getting in a few projects around the lawn.  With Fall right around the corner, now is the time to prepare for the incoming colder months.  If you’re trying to get some work done this extra long weekend, here are five easy projects for your labor day weekend.

pruning_tree1. Prune Trees

After only a few minutes with a pruner, your trees and shrubbery will be looking great!  Clear way those dead branches and unsightly twigs.  Trimming away any out of control limbs will be sure to give your trees a clean appearance.

aerator2.  Aerate your Lawn

Over the summer, you probably put a lot of pressure on your lawn – literally.  When soil becomes compacted due to high traffic and usage, it becomes harder for it to receive nutrients and oxygen.  Regularly aerating your lawn drastically improve it’s ability to breathe properly, which will result in a beautiful, deep green color.

And for most cool season grasses , the best time to aerate is RIGHT NOW!  Early fall aerating will help to promote healthy growth and aeration when your lawn needs it the most!

edge3. Edge Sidewalks

If weeds and grass are starting to creep up onto your sidewalk or driveway, you could probably stand edging.  Using an edger or weed trimmer, clean up along paths and walkways to give your exterior a neat, symmetrical look.

bm218164. Mulch your Lawn

Mulch Kits do wonders for your lawn’s health and appearance!  They dramatically reduce the size of your lawn clippings, which makes it easier for them to break down.  Fall is also the best time to mulch your lawn!  Using a mulching kit promotes healthy growth and aeration, while severely reducing damaging thatch buildup.  Mulch Kits are also incredibly easy to install!  If you don’t have one, then it look’s like you’ve found your Labor Day plans!

bolt5. Sharpen your Mower Blades

Just as it’s important to keep your lawn maintained heading into Fall, it’s equally important to maintain your lawn mower!  By this point in the summer, your lawn mower blades have probably taken quite a beating.  Dull or chipped lawn mower blades can leave your lawn looking dull.  If you’re not sure if your lawn mower blades need sharpening, look at your lawn right after you mow.  If your lawn looks white immediately after mowing, that means the grass blades are being torn, rather than cut, which is damaging to your lawn.  Replacing your lawn mower blades can be done in under 10 minutes, and it will do wonders for your lawn!

Along with maintaining your lawn before Fall, maintaining your lawn mower is just as important!  By now, your lawn mower blades have probably taken quite a beating.  Dull or chipped lawn mower blades can leave your lawn looking dull.  One telltale sign of dull blades is that your lawn will begin to look white right after you mow.  This is a sign that the grass blades are being torn, rather than cut.  If this is the case, then it’s time for a blade replacement.  Replacing your lawn mower blades is a simple task that can be done in under ten minutes.

By now, you’ve probably got a list of projects to do this weekend!  We hope you have a great Labor Day Weekend!

Mid-Summer Mower Maintenance Tips

4 Steps to Keeping your Lawn Mower Running all Summer Long

Summer is almost halfway over, which means your lawn mower has probably seen it’s fair share of daylight.  In order to keep your lawn mower running great all summer long, now is the perfect time to give your mower a mid-season tune up.  Here are five steps to giving your lawn mower some mid-season maintenance.

1. Give your Lawn Mower a Good Cleaning

The first step in giving your lawn mower a mid-summer tuneup is to clean it up a little bit.  During the first half of the summer, chances are, your mower has collected some dirt, debris and grass.  It’s important to give your mower a good cleaning.  Clean thoroughly, especially underneath the mower deck.  Grass buildup underneath the mower deck can hold a great deal of moisture, which will make your mower deck rust.

PRO TIP2PRO TIP:  Save water and use an air compressor to get rid of debris quickly!  If you don’t have an air compressor, a leaf blower will work just as well.

bolt2. Tighten Bolts and Hardware

Over the course of a summer, your lawn mower takes on a great deal of wear.  Vibrations among other things can cause bolts on your lawn mower to loosen.  Grab a wrench and make sure all of your hardware and bolts are tightened up!

air filter3. Change the Air Filter

If your air filter is dirty, then it’s probably time to change it.  Replacing your paper air filter can maximize your mowers performance and engine life.  If your air filter is foam, then you could probably benefit from cleaning it.  Using soap and water, remove all debris, grass, and anything else it might have collected so far.

blades4. Check the Blades

Well sharpened blades can make all the difference in the world, when it comes to cut quality.  Remove the blades and carefully inspect them for chipped or dull edges or any chunks that are missing. Properly balanced and sharpened Lawn mower blades are without a doubt, the most important part of achieving a high quality of cut.

After you do these 4 simple steps, your lawn mower should be all ready to take on whatever you throw at it, as we head into the last half of the summer.  Happy Mowing!

How to Change your Lawn Mower’s Spark Plug Like a Pro

Changing the Spark Plug on your Lawn Mower

If you can’t get your lawn mower to start, many times it’s because of a faulty spark plug.  An old or dirty spark plug can cause your lawn mower to have problems starting.  Does your lawn mower start on the first pull?  If not, simply replacing your spark plug can usually be exactly what your mower needs.  Fortunately, replacing your mower’s spark plug is one of the easier things you can do for your mower.  Here is a step by step guide to changing your lawn mower’s spark plug in under 10 minutes!

Does your Spark Plug Need Changed?

If your lawn mower doesn’t start on the first or second pull, then it’s probably time for a new spark plug.  To decide whether or not you need to change your spark plug, first remove your old one and inspect the tip.  If it’s black or dark in color or covered in debris, then it’s time to change your spark plug.  Fortunately, spark plugs are incredibly inexpensive and super easy to replace!

You will Need:

  • New Spark Plug
  • Spark Plug Socket Wrench (These types of sockets contain a rubber insert that protects the ceramic spark plug.)

How to Change the Spark Plug

1. Disconnect the spark plug wire and clean around the spark plug hole with a wire brush.

2. Using a spark plug socket, remove the old spark plug.

3. Purchase a new spark plug.  New spark plugs typically only cost a few dollars.  Take the old spark plug into your local lawn mower service professional  or hardware store to have it replaced.  All spark plugs come with the model number printed right on them, so you can be sure you’re getting the right one.

4. Install the new Spark Plug.  Insert the new spark plug into the spark plug hole.  Turn the spark plug by hand until you can’t anymore, then use the spark plug socket to tighten the spark plug into place.  Don’t over-tighten the the spark plug – applying too much pressure can crack the ceramic spark plug.  Once the new spark plug is in place, connect the spark plug wire and you’re ready to go!

Changing your Lawn Mower Blades in Less than 10 Minutes

How to Change your Lawn Mower Blades

The key to a better looking lawn sometimes lies in new lawn mower blades.  If you’re noticing any missed patches of tall grass right after mowing your lawn, then it could be time to replace your lawn mower blades.   The quality of your mowing can be greatly improved by newer, sharper lawn mower blades!  Fortunately, lawn mower blades are easy to replace and inexpensive!  If you’ve never replaced your lawn mower blades – don’t worry!  Here is a step by step guide to changing your lawn mower blades in under ten minutes!

spark-plug1. Disconnect the Spark Plug

As always, be sure to disconnect the spark plug before doing any work to your lawn mower.  This will keep the engine from accidentally engaging while you are underneath the mower; which removes any chance of accidents.

2. Lift the Deck

Before you can change the mower blades, you need to be able to easily access the underside of your mower.  If you have a walk behind lawn mower, simply tilt the mower back and prop it up on its side.  Be sure to pay attention to which side your gas tank is on and avoid tilting your mower in a way that will spill gas on the engine.  However, if you have a lawn tractor or a zero turn mower, you will need to lift up the deck with a jack.

PRO TIP2Before tilting your walk behind lawn mower back, take off the gas cap and lay a plastic sandwich bag over the opening of the gas tank.  Then replace the cap, twisting it securely.  This will make sure no gas spills out during the blade changing process.

bolt3. Take Off the Mounting Bolt

After you have the mower propped up on its side, it’s time to remove the blade.  Keep in mind that it’s usually a good idea to wear gloves when handling a sharp blade.  In most lawn mowers, there are between 1 and 3 bolts holding the blade into place.  Using a socket wrench, unscrew the bolt from the deck’s mount.  Pay attention to which direction the blade is positioned, because the new blade will go on exactly like that.

PRO TIP2

PRO Tip: Before taking off the old blade, take a picture of the underside of your mower deck with your phone.  That will help you be sure the new blade goes on the same way.

4. Install the New Blade

Once you have a new blade, using the same socket wrench, attach it to the mount.  Make sure that the blade is positioned exactly the same way the old blade was.  Don’t over tighten the bolt – this can cause warping in the blade. Once the new blade is on, sit the mower back up and connect the spark plug wire!  After this, you should be ready to mow like a pro!

How to Get your Lawn Mower Ready for Spring

Mower Tune Up Blog

5 Easy Steps for Tuning up Your Lawn Mower

Last weekend, the weather warmed up enough for me to celebrate with my First Mow of the spring!  I pulled the lawn mower out of the garage, and pulled the string, only to find it wouldn’t start… After a long winter of sitting in the garage, my mower wasn’t ready to take on the task at hand.  That means it’s time for a tune up!

Even if your lawn mower is running fine, annual tune ups can prevent costly repairs, increase your engine life and improve your fuel economy by 33 percent!  Here are five steps for tuning up your lawn mower and getting ready for spring!

Change the Oil

After a long winter, if your lawn mower won’t start, the first thing to check is the oil.  It’s usually a good idea to change the oil in your lawn mower at least one time each year.  If your oil needs to be changed, here are three steps to change your oil.

  1. First, before messing with your lawn mower, be sure to REMOVE THE SPARK PLUG WIRE.  That will ensure that your mower doesn’t accidentally start up while you’re in there working on it.
  2. Next, remove the drain plug and tilt the mower back to empty the old oil.  Be sure the gas cap is on tight, or remove the gas in order to avoid spills.
  3. Refill the mower with the new oil.  Make sure you don’t put too much oil in.  Most mowers hold 18-20 ounces of oil.  If your lawn mower has a dipstick, use that to check the level.

Check the Gas

It’s usually a good idea to start each mowing season with a fresh tank of gas.  Keep that in mind this fall, before you put your mower away for the season.  Let your gas run out or empty the tank before storing it for the winter.  In the winter, condensation can build up in the tank and gas line and freeze, which can lead to bigger issues.  Using fresh gas can make sure your lawn mower starts right up.

air filterCheck the Air Filter

The next step in tuning up your lawn mower is checking the air filter.  If you have a paper filter, it will probably need to be changed at least once per year.  If your air filter is gray or brown, then it’s time to change it.  New air filters an extremely inexpensive way to be sure your mower is running at it’s top performance.  New air filters increase fuel efficiency, reduce emissions, and extend your engine life.

If you have a foam filter or pre-filter, you can also rinse it out with soap and water.

sparkplugChange the Spark Plug

If, like me, you go to start your lawn mower in the spring and it won’t start, there’s a good chance it’s the spark plug.  On the bright side, sparkplugs are also a cheap and easy fix.  If the tip of your spark plug is black or dark, then you could probably use a new spark plug.

All you have to do is use a socket wrench to remove the old spark plug, and replace it with the new one.  Make sure you purchase the correct spark plug by taking it into your local dealer or checking out this online lawn mower parts store.  There’s a good chance that after switching out your spark plug, it will start right up!

bladesChange or Sharpen Blades

Another aspect of tuning up your lawn mower is checking your blades.  Before mowing, make sure your blades are balanced, sharp, and free of nicks and damage.  Balanced lawn mower blades will make your lawn look as great as it can be!

If you need to change your lawn mower blade, tilt the mower so you can easily get to the bottom of the deck.  Again, be sure to UNPLUG THE SPARK PLUG CABLE, and WEAR GLOVES!  With a socket wrench, take out the bolt that’s holding your blade to the mount.  Also, make sure to clean out the bottom of your mower deck of any grass or debris.

When putting the new blade on, pay attention to the direction and position of your blade.  Make sure it’s the same position as your old blade.  Use a socket wrench to attach the new blade.

After you follow these 5 steps, your lawn mower should be all tuned up and ready to take on anything you throw at it this summer!

How to Get Green Grass Part 3: Overseeding

overseedingWhy You Should Overseed Your Yard

With summer in the air, now is the time to begin thinking about your lawn.  If your grass is dry, patchy and brown, you’re not alone.  Fortunately, complete turf renovation is not as hard as you might think.  By following these three steps, you will be well on your way to having beautiful, green, golf course quality grass.

  1. Dethatching
  2. Aerating
  3. Overseeding

Last week, we talked about the importance of aerating your yard.  Once your yard is properly aerated, then the third and final step in achieving a beautiful, green lawn is overseeding.  In this article, we’ll talk about what overseeding is, how it can help your lawn, and how to properly overseed.

seedingWhat is Overseeding?

If your lawn is patchy, brown and dry, it might be because the grass has actually died out.  When you overseed, you plant grass seed directly over your existing turf.  Overseeding is a simple way to fill in dead or thin spots of grass, giving you a thicker, more green lawn. Overseeding can be done with either a spreader or an overseeder.

The Benefits of Overseeding

Many types of grass (especially cool season grasses) typically lie dormant or can even die in hot weather or when exposed to excess sunlight.  Because of this state of dormancy, grass turns a brown, unhealthy shade.

Overseeding is the easiest and most effective way to allow that rich, green color to be returned to your yard.  Overseeding will also make your turf thicker, healthier, and less prone to weeds.

How to Overseed your Yard

If your yard has spots of discoloration or poor growth, you could probably benefit from overseeding.  In order to grow thick, healthy grass, and get the most out of your grass seed, seed to soil contact is key.  Because of this, the best time for overseeding is right after your yard has been aerated.  Aerating before overseeding will help the grass take root and germinate more quickly.

Before you overseed, you have to choose which type of grass you would like to grow.  The most important factor in choosing the right grass is climate zone.  The map below breaks the country down into three groups:  cool-season zone, transitional zone, and warm-season zone.

Grass-type-season-in-USA

Check out the map, and whichever zone you are in will help you determine which grass is best for your region.  If you’re in the cool season region, popular choices are Kentucky Bluegrass, Perennial Ryegrass and Fescues.  However, if you’re in a warm season region, Zoysia and Bermudagrass are both great choices.

When planting grass seed, one common practice is to use a blend of two or three different types of grass.  For example, bluegrass is a great grass for cool season zones, but it can take up to three weeks to germinate.  Because of this, adding some fescue in your bluegrass can help the growing process because fescues only take about a week to germinate.  The fescue will protect the sensitive bluegrass seeds from the elements until they get a chance to germinate.

Once you choose the perfect grass combination, it’s time to overseed.  Go over your lawn thoroughly with a spreader or an overseeder.  After you overseed, gently go over your yard with a rake in order to allow the seeds to settle in.  After you have done both of these steps, then you can begin to water your lawn.

Well, that about does it for our turf renovation series.  Thanks for reading, and hopefully after you follow these simple steps you will be on your way to having the greatest looking lawn on the block!  Feel free to share some pictures of your newly beautiful lawn!

How to Get a Golf Course Quality Yard

green-grass

4 Steps to Greener Grass

If you’ve ever been to a golf course, you might have noticed that the grass quality there is absolutely astounding!  I know I’ve always been jealous of how perfect the grass at golf courses are.  Then I decided to do something about it.  If your lawn is thin, bare, and dry, you are not alone.  But it doesn’t have to be that way!  Complete turf renovation is only four steps away.  Here are four simple steps you can take in order to achieve lush, green, golf course quality grass in your own yard.

  1. Dethatching
  2. Vacuuming
  3. Aerating
  4. Overseeding

dethatchingDethatching:

Thatch is that layer of dead grass, roots and stems that can build up between the surface of your soil and the grass.  Thatch can build up when your turf produces organic debris quicker than it can break it down.

While it’s true that a thin layer of thatch can be healthy for your lawn, when thatch buildup becomes thicker than half an inch, thatch can act as a sponge and prevent water & other essential nutrients from reaching the soil.  When this happens, thatch can literally choke your lawn, slow down growth and turn your grass an unhealthy brown shade.  Don’t believe me?  Grab a rake, go out to your yard, and firmly run your rake along the turf.  Chances are, it will pull up a layer of dead grass.  This dead grass (or thatch) can be fatal to the quality of your yard.

When you dethatch your yard, you are essentially combing your yard of matted thatch that can stifle grass growth.  For smaller yards, dethatching can be done with a rake, but when it comes to bigger areas, a dethatcher can be essential.  Popular types of dethatchers available include walk behind dethatchers or pull behind dethatchersif you have a riding lawn mower.

baggerVacuuming:

After you dethatch your yard, you will essentially have a layer of dead grass right on top of your turf.  In order for you to maintain a healthy, beautiful yard, it is essential to get rid of the thatch.  If you don’t vacuum the thatch from your yard, it will only be a matter of time before the thatch is matted down into your turf again.  Vacuuming your yard can be done with a lawn vacuum or even a lawn mower equipped with a bagger or grass catcher.

After vacuuming, your yard will be totally free from thatch and much healthier.  And by now you should even begin to notice a difference in the color and quality of your grass.

aeratorAerating:

The third (and possibly most important) step in achieving a healthy, beautiful yard is ensuring that your soil can breathe properly.  Over time and years of traffic, your soil becomes compacted.  When this happens, it becomes harder for your soil to take in nutrients, water, and oxygen. Lawn Aeration helps to stimulate root growth by making tiny holes in your yard.  This helps your lawn to better breathe and receive necessary nutrients.


There are basically two models of aerators: spike aerators and plug aerators. Spike aerators simply cut small holes in the turf.  On the other hand, plug aerators cut larger, deeper holes, and remove plugs of turf, scattering them along the turf.

The best time to aerate your yard is when the soil has some moisture to it, so be sure to aerate your yard after a light rain.  Although rain isn’t necessary — just make sure to water your lawn the day before you aerate.

seedingOverseeding

The last step to a greener yard is overseeding.  Often times, if your yard looks “dead,” it’s because it is.  Over time and use, grass dies out, making your yard look thin.  Overseeding is the act of planting grass seed directly on top of existing turf.  This will help to make your lawn look thicker, and will even fill in bare spots, giving you a greener, more lush yard.

When overseeding your yard, it’s important to make sure that the seed comes in direct contact with your soil.  Because of this, the best time to overseer your yard is immediately after aeration.  After overseeding, be sure to gently pass over your yard with a rake in order to help the seeds settle in.  It’s also usually a good idea to water your lawn right after you overseed, in order for the grass seed to take root and germinate.

After taking these four steps, you will be well on your way to having a beautiful, healthy lawn that you can take pride in.  Not only will your yard be the best looking lawn on the block, but your grass will soon be looking as green as the fairway on Hole 9.