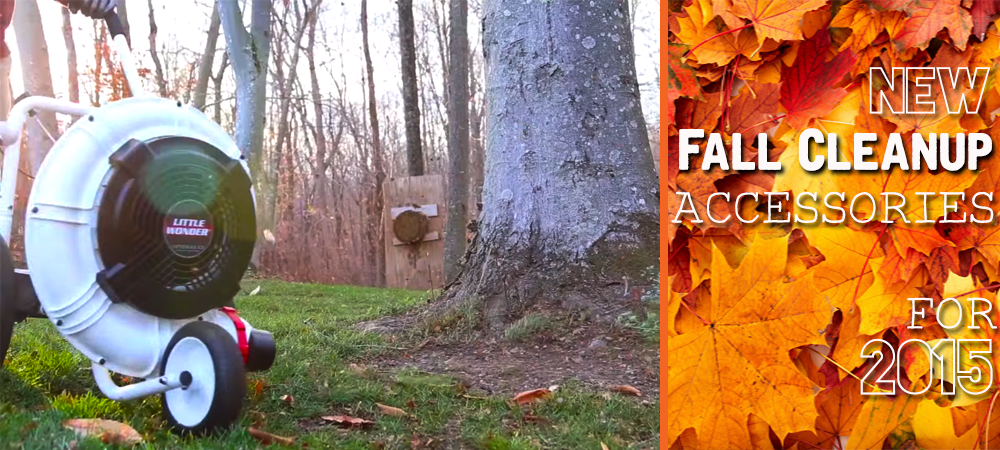
New Fall Cleanup Accessories for 2015

New Leaf Cleanup Accessories for 2015

As we’re headed into Fall, temperatures aren’t the only thing dropping!  You might have noticed all the leaves!  Nothing can screw up your lawn mower than leaves.  Fortunately, there are some great new leaf cleanup products from Stihl, Trac-Vac, Little Wonder and more!  If leaves are starting to take over your lawn, then it’s time to fight back!  Here is a guide to some of the best new fall cleanup accessories, including Leaf Blowers, Lawn Vacuums and more!

c5-blower-02Little Wonder C5 Wheeled Leaf Blower

It’s no wonder why the Little Wonder C5 Wheeled Blower is one of the most popular leaf blowers on the market.  It’s powerful, yet lightweight design features never-flat, oversize wheels and a padded handle for maximum operator comfort and the simplest maneuvering.  This great new leaf blower even features the new, adjustable Aim Rite nozzle for maximum versatility.


KV650_534x575Billy Goat Walk Behind Leaf Vacuum

If lawn vacuums are more your style, the Billy Goat Walk Behind Leaf Vacuum is a perfect choice for any homeowner.   This powerful vacuum features a heavy duty Briggs & Stratton Engine, a 27″ clearing width and heavy duty construction that’s rugged enough to pick up leaves, grass and even pinecones!

Trac-VacTrac-Vac Pull Behind Leaf Collection System

On the other hand, if you have a little more land to clear, Trac-Vac has a wide variety of pull behind leaf collection systems that are ideal for large areas.  Whether you will be pulling the Trac-Vac system behind a  lawn tractor, zero turn lawn mower, or compact tractor, there is a Trac-Vac collection system that is perfect for you and your operation.   Simply tow this system behind your mower or tractor and experience a clean, perfect lawn.


BR600-MagnumStihl Leaf Blowers

Whether you’re a homeowner or a commercial landscaper, Stihl leaf blowers are perfect for any user.  Stihl offers a wide variety of leaf blowers at any price point so you can be sure to find the perfect blower for you.  Stihl handheld leaf blowers are lightweight, powerful and even come in battery powered models!   If you’re going to be operating a leaf blower for longer periods of time, then Stihl backpack blowers are more up your alley!  Lightweight, comfortable and super convenient, the Stihl backpack blowers rest easily on your back while you go to work!  Now, Stihl even offers an Electric Start Backpack blower for added convenience!

gutterkitStihl Gutter Kit

We can all pretty much agree that clearing gutters is – hands down, the worst part about fall cleanup.  Between shaky ladders and wet, smelly leaves, gutter cleanup typically makes for a pretty bad afternoon.  Well, you’re in luck!  The days of getting up on a ladder are over!  Stihl now offers an incredibly convenient gutter cleaning kit!  This kit consists of a series of plastic tubes that can easily attach to most handheld leaf blowers and extend over ten feet!  Now you can clean your gutters from the safety of the ground!

Top 5 Best Accessories for your Exmark Lawn Mower

Top 5 Exmark Lawn Mower Accessories

If you have an Exmark Lawn Mower, then you already know how great it is.  It’s not hard to fall in love with an Exmark mower.  Between Exmark’s tremendous engineering, quality and intuitive controls, it’s not hard to see why Exmark is ahead of the class in commercial and residential lawn mowing.  Along with Exmark’s amazing performance, they even have a few accessories that can instantly improve your mowing experience.  If you would like to take your cutting to the next level, then check out these awesome Exmark Lawn Mower Accessories.

12volt5. 12 Volt Adapter

This 12 Volt Adapter lets you power anything you might need while you’re mowing.  This is an absolute must-have for any operator.  Whether you’re charging your phone, GPS or any other accessory, this adapter is a necessity.  It’s also conveniently located to make it easy to access during operation.

trash4. Trash Container Kit

You don’t have time to stop and worry about debris while you’re mowing.  And now you don’t have to!  The Exmark Trash Container Kit allows you to pick up any trash or debris and throw it away on the go – in no time at all.  This container is conveniently located within arm’s reach of the operator.  It features a 2.5 Gallon capacity basket with durable, easy to clean, mesh material.

ultravac33. UltraVac Bagger Collection System

The Exmark UltraVac Bagger Collection System takes your yard to the next level of quality. This bagger collects all excess debris into the hopper with every pass, which leaves behind a neat, crisp appearance.  Along with picking up any grass clippings, bagger systems are also great at picking up leaves in the fall, making your lawn look flawless.

The Exmark UltraVack Bagger collection system also features quick-attach capabilities, which allow you to easily switch between side discharge and bagging.  Plus, only Exmark’s bagging system features a wide diameter tube that helps reduce clogging.

ocd2. Operator Control Discharge

When mowing around sensitive objects like cars, windows, and mulch beds, you know that every second counts.  The operator control discharge system allows you to quickly and easily operate the discharge chute.  This awesome accessory is compatible with any Exmark Lazer Z or Vantage Lawn Mower.  This is a must-have accessory – especially for landscape professionals.

stripingkit31. Turf Striper Kit

Have you ever been at a baseball game and paid attention to the outfield?  Most ballparks use a really neat looking striping effect for their outfield grass.  This gives the lawn a beautiful, professional look.  Well, now lawn stripes aren’t just for the ballpark.  With the Exmark Turf Striper Kit, you can have that fresh, ballpark look right in your own backyard.

These striping kits attach to existing mounting points, which makes installation quick and easy.  The innovative design makes it easy for you to service the striper kit, which will make sure that it lasts season after season.

The New Stihl Push Button Start Backpack Blower

Introducing the Stihl BR 450 C-EF

Backpack blowers can be a pain – especially if you’re a commercial landscaper.  When you’re on a job that requires multiple stops and starts, your choices are to:

  1. Power the blower off only to have to remove the whole unit to restart it when you get to the next job.
  2. Leave the blower running while you move to the next job, wasting fuel.

Who wants to remove the blower from your back every time you need to restart it?!? The fact is – most backpack blowers are not designed for on-the-go landscapers.  For the first time, the Stihl BR 450 C-EF Electric Start Backpack Blower completely eliminates the need for removing the blower every time you need to restart!

450 handle
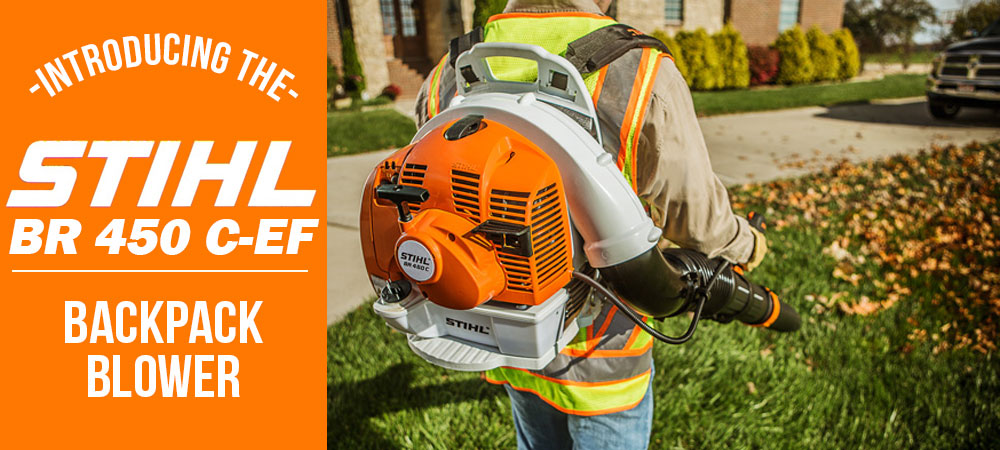
Innovative Electric Start System

The innovative Stihl BR 450 C-EF is the ONLY backpack blower available with Electric Start.  That’s right — this awesome new blower allows you to start it up while the unit is still on your back!  No more time wasted putting on and taking off your blower.  No more fuel wasted by letting the blower idle.

Extreme Power

Along with the incredibly easy startup, the BR 450 C-EF also offers exceptional blowing power once it’s started.  Weighing in at only 25 pounds, the BR 450 C-EF is powered by an incredibly lightweight, but powerful 63.3 cc Engine.  That power, combined with blowing speeds of up to 186 MPH, gives you one of the most powerful blowers on the market.

450 side viewAnti-Vibration System
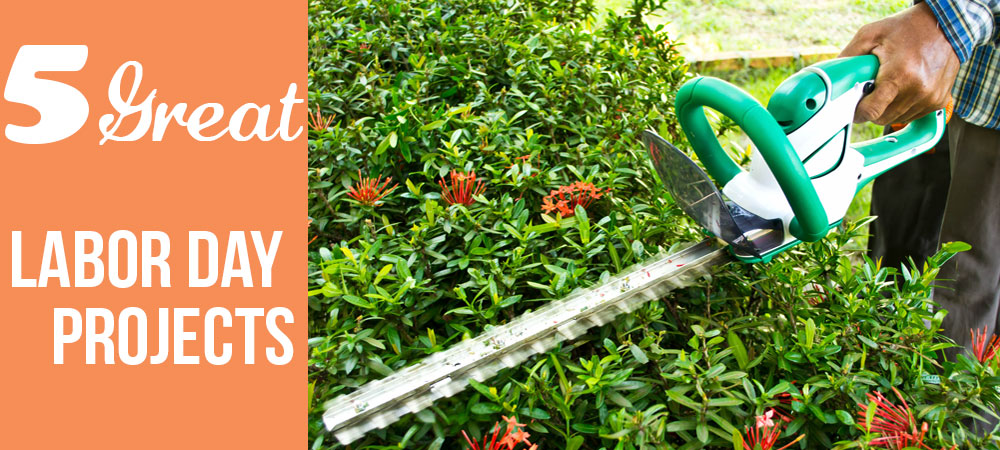
Backpack blowers can wreak havoc on your back when you use them for long periods of time.  Many bulky, heavyweight blowers don’t take the operator into account.  On the other hand, the Stihl BR 450 C-EF Backpack Blower was designed with you in mind.  Stihl’s amazing anti-vibration technology drastically reduces the amount of engine vibrations, which gives you a much more comfortable experience with NO fatigue.  When using the BR 450 C-EF, you can keep going all day long.

 Multi-Function Control Handle

Aside from tremendous blowing power and incredibly user-friendly features, another awesome feature on the BR 450 C-EF is the intuitive controls, all the way around.  The design of the Multi-Function Control Handle allows easy access to all of the controls.  The intuitive control panel allows you to quickly complete any task without your hand ever having to leave the handle.

These are just few of the reasons that the new Stihl BR 450 C-EF Electric Start Backpack Blower is going to be a huge game-changer in the world of professional landscaping.

Five Quick and Easy Labor Day Weekend Projects Around the Lawn

5 Easy Projects to get your Lawn Ready for Fall

Each year, Labor Day comes along to celebrate you!  You’ve been working hard all year long and it shows!  To celebrate all that you do, we’re giving you the day off!  So take an extra long weekend and relax!  Kick back and enjoy some “you time!”  Labor Day weekend is also great for getting in a few projects around the lawn.  With Fall right around the corner, now is the time to prepare for the incoming colder months.  If you’re trying to get some work done this extra long weekend, here are five easy projects for your labor day weekend.

pruning_tree1. Prune Trees

After only a few minutes with a pruner, your trees and shrubbery will be looking great!  Clear way those dead branches and unsightly twigs.  Trimming away any out of control limbs will be sure to give your trees a clean appearance.

aerator2.  Aerate your Lawn

Over the summer, you probably put a lot of pressure on your lawn – literally.  When soil becomes compacted due to high traffic and usage, it becomes harder for it to receive nutrients and oxygen.  Regularly aerating your lawn drastically improve it’s ability to breathe properly, which will result in a beautiful, deep green color.

And for most cool season grasses , the best time to aerate is RIGHT NOW!  Early fall aerating will help to promote healthy growth and aeration when your lawn needs it the most!

edge3. Edge Sidewalks

If weeds and grass are starting to creep up onto your sidewalk or driveway, you could probably stand edging.  Using an edger or weed trimmer, clean up along paths and walkways to give your exterior a neat, symmetrical look.

bm218164. Mulch your Lawn

Mulch Kits do wonders for your lawn’s health and appearance!  They dramatically reduce the size of your lawn clippings, which makes it easier for them to break down.  Fall is also the best time to mulch your lawn!  Using a mulching kit promotes healthy growth and aeration, while severely reducing damaging thatch buildup.  Mulch Kits are also incredibly easy to install!  If you don’t have one, then it look’s like you’ve found your Labor Day plans!

bolt5. Sharpen your Mower Blades

Just as it’s important to keep your lawn maintained heading into Fall, it’s equally important to maintain your lawn mower!  By this point in the summer, your lawn mower blades have probably taken quite a beating.  Dull or chipped lawn mower blades can leave your lawn looking dull.  If you’re not sure if your lawn mower blades need sharpening, look at your lawn right after you mow.  If your lawn looks white immediately after mowing, that means the grass blades are being torn, rather than cut, which is damaging to your lawn.  Replacing your lawn mower blades can be done in under 10 minutes, and it will do wonders for your lawn!

Along with maintaining your lawn before Fall, maintaining your lawn mower is just as important!  By now, your lawn mower blades have probably taken quite a beating.  Dull or chipped lawn mower blades can leave your lawn looking dull.  One telltale sign of dull blades is that your lawn will begin to look white right after you mow.  This is a sign that the grass blades are being torn, rather than cut.  If this is the case, then it’s time for a blade replacement.  Replacing your lawn mower blades is a simple task that can be done in under ten minutes.

By now, you’ve probably got a list of projects to do this weekend!  We hope you have a great Labor Day Weekend!

Mid-Summer Mower Maintenance Tips

4 Steps to Keeping your Lawn Mower Running all Summer Long

Summer is almost halfway over, which means your lawn mower has probably seen it’s fair share of daylight.  In order to keep your lawn mower running great all summer long, now is the perfect time to give your mower a mid-season tune up.  Here are five steps to giving your lawn mower some mid-season maintenance.

1. Give your Lawn Mower a Good Cleaning

The first step in giving your lawn mower a mid-summer tuneup is to clean it up a little bit.  During the first half of the summer, chances are, your mower has collected some dirt, debris and grass.  It’s important to give your mower a good cleaning.  Clean thoroughly, especially underneath the mower deck.  Grass buildup underneath the mower deck can hold a great deal of moisture, which will make your mower deck rust.

PRO TIP2PRO TIP:  Save water and use an air compressor to get rid of debris quickly!  If you don’t have an air compressor, a leaf blower will work just as well.

bolt2. Tighten Bolts and Hardware

Over the course of a summer, your lawn mower takes on a great deal of wear.  Vibrations among other things can cause bolts on your lawn mower to loosen.  Grab a wrench and make sure all of your hardware and bolts are tightened up!

air filter3. Change the Air Filter

If your air filter is dirty, then it’s probably time to change it.  Replacing your paper air filter can maximize your mowers performance and engine life.  If your air filter is foam, then you could probably benefit from cleaning it.  Using soap and water, remove all debris, grass, and anything else it might have collected so far.

blades4. Check the Blades

Well sharpened blades can make all the difference in the world, when it comes to cut quality.  Remove the blades and carefully inspect them for chipped or dull edges or any chunks that are missing. Properly balanced and sharpened Lawn mower blades are without a doubt, the most important part of achieving a high quality of cut.

After you do these 4 simple steps, your lawn mower should be all ready to take on whatever you throw at it, as we head into the last half of the summer.  Happy Mowing!

How to Change your Lawn Mower’s Spark Plug Like a Pro

Changing the Spark Plug on your Lawn Mower

If you can’t get your lawn mower to start, many times it’s because of a faulty spark plug.  An old or dirty spark plug can cause your lawn mower to have problems starting.  Does your lawn mower start on the first pull?  If not, simply replacing your spark plug can usually be exactly what your mower needs.  Fortunately, replacing your mower’s spark plug is one of the easier things you can do for your mower.  Here is a step by step guide to changing your lawn mower’s spark plug in under 10 minutes!

Does your Spark Plug Need Changed?

If your lawn mower doesn’t start on the first or second pull, then it’s probably time for a new spark plug.  To decide whether or not you need to change your spark plug, first remove your old one and inspect the tip.  If it’s black or dark in color or covered in debris, then it’s time to change your spark plug.  Fortunately, spark plugs are incredibly inexpensive and super easy to replace!

You will Need:

  • New Spark Plug
  • Spark Plug Socket Wrench (These types of sockets contain a rubber insert that protects the ceramic spark plug.)

How to Change the Spark Plug

1. Disconnect the spark plug wire and clean around the spark plug hole with a wire brush.

2. Using a spark plug socket, remove the old spark plug.

3. Purchase a new spark plug.  New spark plugs typically only cost a few dollars.  Take the old spark plug into your local lawn mower service professional  or hardware store to have it replaced.  All spark plugs come with the model number printed right on them, so you can be sure you’re getting the right one.

4. Install the new Spark Plug.  Insert the new spark plug into the spark plug hole.  Turn the spark plug by hand until you can’t anymore, then use the spark plug socket to tighten the spark plug into place.  Don’t over-tighten the the spark plug – applying too much pressure can crack the ceramic spark plug.  Once the new spark plug is in place, connect the spark plug wire and you’re ready to go!

How to Get Green Grass Part 3: Overseeding

overseedingWhy You Should Overseed Your Yard

With summer in the air, now is the time to begin thinking about your lawn.  If your grass is dry, patchy and brown, you’re not alone.  Fortunately, complete turf renovation is not as hard as you might think.  By following these three steps, you will be well on your way to having beautiful, green, golf course quality grass.

  1. Dethatching
  2. Aerating
  3. Overseeding

Last week, we talked about the importance of aerating your yard.  Once your yard is properly aerated, then the third and final step in achieving a beautiful, green lawn is overseeding.  In this article, we’ll talk about what overseeding is, how it can help your lawn, and how to properly overseed.

seedingWhat is Overseeding?

If your lawn is patchy, brown and dry, it might be because the grass has actually died out.  When you overseed, you plant grass seed directly over your existing turf.  Overseeding is a simple way to fill in dead or thin spots of grass, giving you a thicker, more green lawn. Overseeding can be done with either a spreader or an overseeder.

The Benefits of Overseeding

Many types of grass (especially cool season grasses) typically lie dormant or can even die in hot weather or when exposed to excess sunlight.  Because of this state of dormancy, grass turns a brown, unhealthy shade.

Overseeding is the easiest and most effective way to allow that rich, green color to be returned to your yard.  Overseeding will also make your turf thicker, healthier, and less prone to weeds.

How to Overseed your Yard

If your yard has spots of discoloration or poor growth, you could probably benefit from overseeding.  In order to grow thick, healthy grass, and get the most out of your grass seed, seed to soil contact is key.  Because of this, the best time for overseeding is right after your yard has been aerated.  Aerating before overseeding will help the grass take root and germinate more quickly.

Before you overseed, you have to choose which type of grass you would like to grow.  The most important factor in choosing the right grass is climate zone.  The map below breaks the country down into three groups:  cool-season zone, transitional zone, and warm-season zone.

Grass-type-season-in-USA

Check out the map, and whichever zone you are in will help you determine which grass is best for your region.  If you’re in the cool season region, popular choices are Kentucky Bluegrass, Perennial Ryegrass and Fescues.  However, if you’re in a warm season region, Zoysia and Bermudagrass are both great choices.

When planting grass seed, one common practice is to use a blend of two or three different types of grass.  For example, bluegrass is a great grass for cool season zones, but it can take up to three weeks to germinate.  Because of this, adding some fescue in your bluegrass can help the growing process because fescues only take about a week to germinate.  The fescue will protect the sensitive bluegrass seeds from the elements until they get a chance to germinate.

Once you choose the perfect grass combination, it’s time to overseed.  Go over your lawn thoroughly with a spreader or an overseeder.  After you overseed, gently go over your yard with a rake in order to allow the seeds to settle in.  After you have done both of these steps, then you can begin to water your lawn.

Well, that about does it for our turf renovation series.  Thanks for reading, and hopefully after you follow these simple steps you will be on your way to having the greatest looking lawn on the block!  Feel free to share some pictures of your newly beautiful lawn!

How to Get Green Grass Part 2: Aerating

aerating blog2

The Importance of Aerating Your Yard

Let’s face it — at some point in your adult life, you have probably dreamt about having the perfect lawn.  Wouldn’t it be great to have the best lawn in the neighborhood?  Well, A perfectly manicured, beautifully green yard is completely achievable.  If your lawn is dry, brown and patch, don’t worry — complete turf renovation is only three steps away!

  1. Dethatching
  2. Aerating
  3. Overseeding

Last week, I covered the importance of dethatching your yard.  Once your yard is clear of any harmful thatch, then you’re ready for the next step — aerating!  This week, I’m going to tell you everything you need to know about aerating your lawn, including: why aerating is important, and how to aerate properly.

tow behind aeratorWhat is Aerating?

Aerating your lawn is arguably one of the most important elements in achieving lush, beautiful grass.  Depending on the amount of foot traffic your lawn receives, your turf has put up with a lot of compaction over the years.  Due to lots of traffic and heavy use, your soil gradually becomes more and more compacted.  Because of this, most lawns could benefit from being aerated at least one time per year.

The process of aerating your lawn not only slows down the effects of compaction, but it actually reverses it!  When you aerate, you are essentially making many tiny holes in your turf.  There are two popular types aerators — spike aerators and plug aerators.  Spike aerators are constructed of a lot of tiny spikes that cut holes in your turf, while plug aerators cut wider and deeper holes, removing larger chunks of soil (plugs).  Both spike and plug aerators are available in walk-behind  (for smaller areas) or tow behind models (for larger yards.)

The Importance of Aerating

Over time, soil compaction makes it hard for soil to receive necessary nutrients like water and air.  One of the most beneficial things you can do for your lawn is to let it breathe properly.  Just like any other organisms, your turf’s ability to breathe easily has a direct effect on healthy growth.  Aerating your lawn removes pressure that inhibits your soil from breathing properly. soil_compaction_001

After aerating, you will soon notice your yard growing thick, green and healthy.  This is because aerating increases the amounts of oxygen and essential nutrients that your soil can take in.  Aerating promotes healthy soil by stimulating root growth, which will improve the overall health and appearance of your lawn.

aeratorHow to Aerate

Now that you know why you should aerate, let’s talk about how to aerate properly.  Before you aerate, make sure that the soil is moist.  This not only makes aerating easier, but it also allows the tines to deeper penetrate the soil.  It’s best to aerate after a light rain.  If that’s not possible, just make sure to water your lawn the day before.

After your yard is properly water and ready to be aerated, pass over your entire yard with an aerator.  If you’re going to be overseeding your lawn, a good time to overseed is right after aerating.  This helps to make sure that the grass seeds penetrate the soil and germinate properly.  After aerating, be sure to water your yard again the day after in order to make the most out of your hard work.

When to Aerate

If you’re going to aerate, be sure to do it during a period of active growth in your lawn.  This time varies depending on a few things: mainly type of grass and climate zone.  For warmer season grasses like Bermudagrass, the best time to aerate is late spring to early summer.  But for cool season grasses like Kentucky Bluegrass, aerating your yard in the late summer to early fall will help to best promote healthy growth.

Stick around, next week I’ll be talking about the third and final step in turf renovation — overseeding.

How to Get a Golf Course Quality Yard

green-grass

4 Steps to Greener Grass

If you’ve ever been to a golf course, you might have noticed that the grass quality there is absolutely astounding!  I know I’ve always been jealous of how perfect the grass at golf courses are.  Then I decided to do something about it.  If your lawn is thin, bare, and dry, you are not alone.  But it doesn’t have to be that way!  Complete turf renovation is only four steps away.  Here are four simple steps you can take in order to achieve lush, green, golf course quality grass in your own yard.

  1. Dethatching
  2. Vacuuming
  3. Aerating
  4. Overseeding

dethatchingDethatching:

Thatch is that layer of dead grass, roots and stems that can build up between the surface of your soil and the grass.  Thatch can build up when your turf produces organic debris quicker than it can break it down.

While it’s true that a thin layer of thatch can be healthy for your lawn, when thatch buildup becomes thicker than half an inch, thatch can act as a sponge and prevent water & other essential nutrients from reaching the soil.  When this happens, thatch can literally choke your lawn, slow down growth and turn your grass an unhealthy brown shade.  Don’t believe me?  Grab a rake, go out to your yard, and firmly run your rake along the turf.  Chances are, it will pull up a layer of dead grass.  This dead grass (or thatch) can be fatal to the quality of your yard.

When you dethatch your yard, you are essentially combing your yard of matted thatch that can stifle grass growth.  For smaller yards, dethatching can be done with a rake, but when it comes to bigger areas, a dethatcher can be essential.  Popular types of dethatchers available include walk behind dethatchers or pull behind dethatchersif you have a riding lawn mower.

baggerVacuuming:

After you dethatch your yard, you will essentially have a layer of dead grass right on top of your turf.  In order for you to maintain a healthy, beautiful yard, it is essential to get rid of the thatch.  If you don’t vacuum the thatch from your yard, it will only be a matter of time before the thatch is matted down into your turf again.  Vacuuming your yard can be done with a lawn vacuum or even a lawn mower equipped with a bagger or grass catcher.

After vacuuming, your yard will be totally free from thatch and much healthier.  And by now you should even begin to notice a difference in the color and quality of your grass.

aeratorAerating:

The third (and possibly most important) step in achieving a healthy, beautiful yard is ensuring that your soil can breathe properly.  Over time and years of traffic, your soil becomes compacted.  When this happens, it becomes harder for your soil to take in nutrients, water, and oxygen. Lawn Aeration helps to stimulate root growth by making tiny holes in your yard.  This helps your lawn to better breathe and receive necessary nutrients.


There are basically two models of aerators: spike aerators and plug aerators. Spike aerators simply cut small holes in the turf.  On the other hand, plug aerators cut larger, deeper holes, and remove plugs of turf, scattering them along the turf.

The best time to aerate your yard is when the soil has some moisture to it, so be sure to aerate your yard after a light rain.  Although rain isn’t necessary — just make sure to water your lawn the day before you aerate.

seedingOverseeding

The last step to a greener yard is overseeding.  Often times, if your yard looks “dead,” it’s because it is.  Over time and use, grass dies out, making your yard look thin.  Overseeding is the act of planting grass seed directly on top of existing turf.  This will help to make your lawn look thicker, and will even fill in bare spots, giving you a greener, more lush yard.

When overseeding your yard, it’s important to make sure that the seed comes in direct contact with your soil.  Because of this, the best time to overseer your yard is immediately after aeration.  After overseeding, be sure to gently pass over your yard with a rake in order to help the seeds settle in.  It’s also usually a good idea to water your lawn right after you overseed, in order for the grass seed to take root and germinate.

After taking these four steps, you will be well on your way to having a beautiful, healthy lawn that you can take pride in.  Not only will your yard be the best looking lawn on the block, but your grass will soon be looking as green as the fairway on Hole 9.

The History of Grass

The History of Grass in the United States

Today, taking a drive around the neighborhood on a typical Saturday morning, the chances are that you will probably see a few people mowing their yards.  However, this wasn’t always the case.  You might not have given it much thought, but the idea of a well manicured lawn is a pretty new idea to the United States.  Here is a brief timeline of the history of grass in the United States.

Around the time of the 18th century, during the European Colonization in the United States, colonists noticed that the quality of grass in the United States was far behind the grass quality in Europe.  In the States, grass typically contained less necessary nutrients, and died much quicker.  Because of this, new colonists preferred to bring grass seed from Europe over to the States.

The First Reel Mower

In 1870, a man named Elwood McGuire of Richmond, Indiana designed the first reel mower in the United States, which made it possible to produce reel type mowers on a massive level.  The first type of mower in the United States resembled a series of blades arranged around a cylinder, with a push handle attached.

12744-1

In 1915, the United States Department of Agriculture worked with the United States Golf Association to find the ideal grass type that would be best for America’s climate.

Shortly after that, in 1919, American Colonel Edwin George produced the first gasoline powered lawn mower.  Although lawn mowers and mower technology was on the rise in the United States, maintaining a well kept yard was still viewed as an impractical, time-consuming task which was primarily reserved for the upper class.  Having a nice looking lawn was viewed as a status symbol, rather than a standard until the 1940s.  Although the United States was mass producing lawn mowers on a grand scale, country clubs, public venues, parks, and golf courses were the only people regularly mowing their lawns.  When it came to homeowners, lawnmowers didn’t receive popularity until much later.

World War II

In 1938, President Franklin D. Roosevelt passed a law to make a 40 hour work-week the standard in the United States. Before this law, blue collar workers typically worked 6 days per week, with a half day on Saturday.  Once the law had passed, homeowners had more time to work on maintaining their yards.  Around this time, having a well-kept yard started to become the standard in the United States.

Soon after, 1941, America entered World War II, leaving women behind to take care of the household chores.  During the war, women were encouraged to maintain their yard as a symbol of strength and morale.

The New Standard in the United States

In 1945, the war had finally ended.  The United States had won the war, the economy was looking good again, and soldiers had come back from war, ready to take on their yard work.  Soon after this, men realized the importance of maintaining a healthy, well-kept lawn.  Beautiful lawns finally became the new standard!

If you’re in the market for a new lawn mower, Mutton Power Equipment has a wide variety of top of the line lawn mowers.  Whether you need a walk-behind mower, a riding mower, or a zero turn mower, they have a wide variety of great new lawn mowers available from industry pioneers such as Toro, John Deere, and Simplicity.  Check out their online store today.